How to Turn a Photo Into a Cartoon Illustration
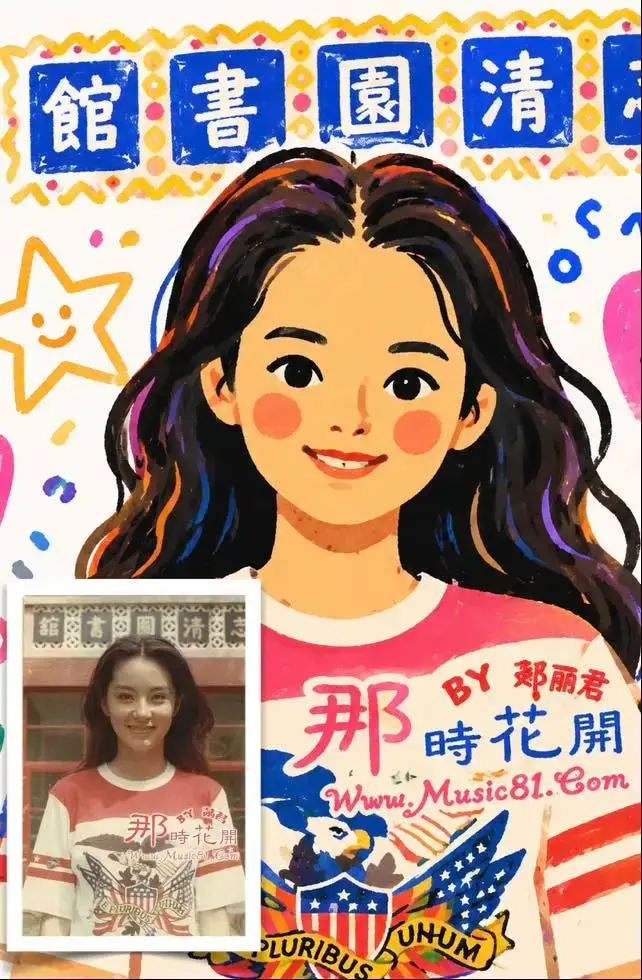
A style pass is not a filter. A filter moves colour and contrast around and leaves every pixel where it was. A redraw throws the photo away and paints a new picture that follows it, which is why two shots of the same person can come back looking like two different characters, and why a photo with a busy background often comes back as confetti.
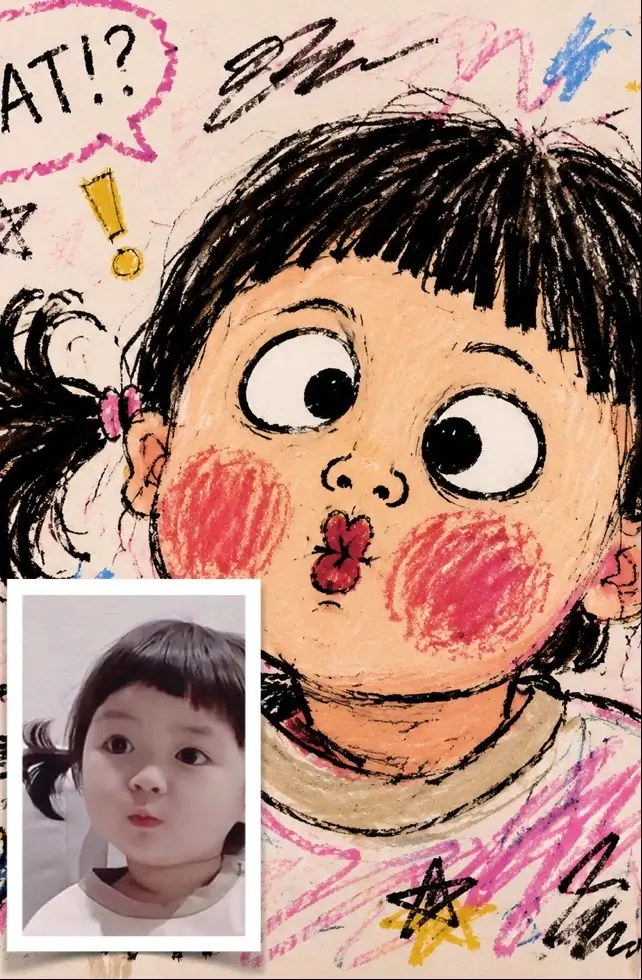
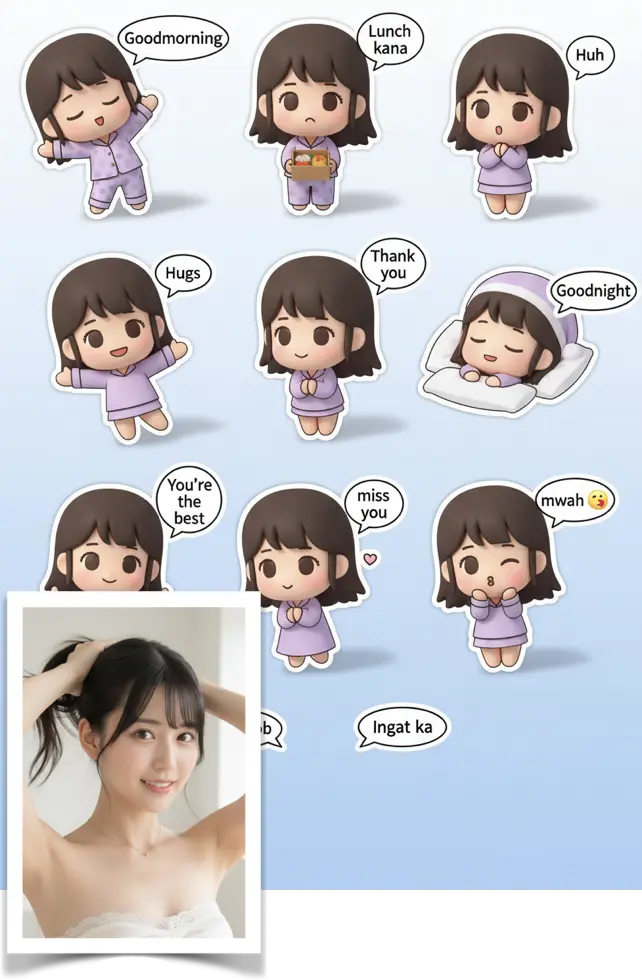
The three shapes people ask for most are a flat folk illustration, a crayon doodle, and a sheet of stickers. They want different source photos, so choose the style first and the picture second.
When a photo-to-cartoon pass is worth doing
A photo converts well when there is not much in it. One person, a clear silhouette, a background that can be thrown away: that works almost every time. A wide shot of a market street does not, because the tool has to invent a flat shape for every stall and every passerby, and the result stops reading as a drawing and starts reading as noise. Group photos struggle for the same reason; when several heads are redrawn at once they tend to come back with the same face shape, so crop to one person and run the file again for the next one.
Use it when the drawing itself is the point: a profile picture that should not look like a photo of you, a mascot built from a portrait, stickers for a family chat, a small illustration for a menu, a set of images for a product page that has to look hand-made. Do not use it when the value of the picture is in its detail. If someone needs to check whether a jacket has a single or a double seam, a drawing cannot tell them, and it will happily invent a collar and a pocket that were never in the frame.
The pass, step by step
Order matters more than settings here. The tool redraws the whole frame, including the parts you did not mean to keep, and anything you fix on a finished drawing is fixed on a drawing rather than on a photo. Look at the eyes and the mouth line in the original before you upload; those two carry the likeness, and they are the first things a flat style flattens away. Hard side lighting is the other thing to watch, because the tool has to decide whether a shadow is a feature of your face or just shade, and it usually guesses wrong.
- Start from the largest copy you have, not a version that has been passed around a chat app. Flat shapes hide compression well, but once the edges are mushy the redraw can only guess at them.
- Crop the source before upload if needed; check the output crop instead of assuming the aspect ratio stays unchanged.
- Remove what you do not want drawn. Half a passerby at the edge, clutter on the table, a logo on a shirt. Do that while the file is still a photo; deleting an object from a finished illustration is far harder.
- Pick the template by how much of the person you want left. The flat illustration keeps the pose and rebuilds almost everything else. The crayon doodle holds on to more of the expression and distorts the proportions on purpose.
- Look at the result at 100 percent on a screen, not in the thumbnail. The details you cannot see in a thumbnail are exactly the ones you have to check: the eyes, the mouth line, the shape of a hand.
- If the face came back wrong, do not keep re-running the same file. Change one thing per attempt: a tighter crop, a different template, a source photo with softer light. Ten runs of one input mostly give you ten versions of the same mistake.
Keeping it recognizable
What people complain about is not the style, it is losing the person. A drawing is allowed to simplify, but it should still read as the same face at a glance. Put the result next to the original on the same screen at the same size; a drawing that looks fine on its own often looks like a stranger the moment the photo sits beside it. Five things move the result more than anything else.
- How strong the style is depends on which template you choose, not on a slider. If you need the person to survive, stay away from the style that redraws the most; there is no setting that pulls it back toward the photo.
- If the features get eaten, change template instead of arguing with the settings. The flat style drops shading by design, so a version that keeps more of the face is a different style, not a stronger version of the same one.
- Hands, glasses, and earrings are where line styles break. A hand with six fingers, or a pair of glasses melted into the eyebrow, is normal. Crop the hand out, or take the photo again with hands behind the back.
- For an avatar, shoot and crop square, and leave a little space above the head. Round profile crops cut into the hair first.
- Do a set in one sitting with the same template and similar light. Two drawings made a week apart, in different styles, do not look like a series even when each one is good on its own.
What goes wrong, and what the tool cannot do
Text is the clearest failure. Ask for a sticker sheet with a caption and the letters come back shaped like letters but not spelled like words, in any script. The way around it is to render the sheet without text and add the caption later, or to treat the squiggles as decoration.
Expect the drawing to invent things. It does not know that the earring is a hoop or that the shirt has four buttons. It sees a dark blob, paints a dark blob, and sometimes puts it in the wrong place. Small repeated details are the first to disappear. Anything hidden behind a hand, a bag strap, or another person stays hidden, because there is nothing in the photo to rebuild it from. Run the same file twice and you get two different drawings, which is fine for a one-off post and awkward when you need a matching pair.
Keep the original photo. A redraw is a one-way conversion, so export and store both files; on a photo, texture and grain cover small mistakes for you, and you will want that version back.
How it fits with the other presets
Get the order right: clean up first, stylise second. A passerby, a wire, or a logo on a shirt should be dealt with while the picture is still a photo. Removing something from a finished flat illustration means repainting flat shapes, and flat shapes are unforgiving, because a patch shows a seam wherever the colour does not line up. If you only spot a stray element after the pass, redoing it from a cleaned photo is usually faster than repairing the drawing.
After the pass, the drawing goes places a photo would not: a sticker printed a few centimetres wide, a chat emoji, a tote bag, a menu header, an illustrated hero image on a product page. Flat styles hold up at small print sizes better than a photograph, because there is no fine grain to lose. Check the exported file at the final print size before you send it anywhere. Lines that look solid on screen can break into a dotted line when they are scaled down, and the printer will not fix that for you.
FAQ
- Can a photo-to-cartoon pass keep the likeness?
- Partly. The flat styles keep the pose, the silhouette, and the hairstyle, and simplify the face a lot. If you have to be recognized instantly, the doodle style is the safer pick, and you should look at the result next to the original before using it anywhere official.
- Why do the glasses always come out wrong?
- Thin frames and lenses are drawn as one dark shape, and the eye behind the lens often disappears. If the drawing has to be accurate, take the photo without glasses; otherwise accept a version where the glasses are only a rough outline.
- Can I print the drawing as a sticker or a poster?
- Small sizes, yes. Export at the largest size the preset gives you and check the lines at the final print size. Do not stretch a small drawing up to poster size, because the edges go soft and the line width becomes uneven.
- Does the source photo need a plain background?
- It helps a lot. The background gets redrawn too, and a busy one turns into abstract shapes behind the head. If your photo has a messy background, clean it up first or crop tighter so that most of it is out of the frame.