Using a Phone Selfie as a Professional Headshot
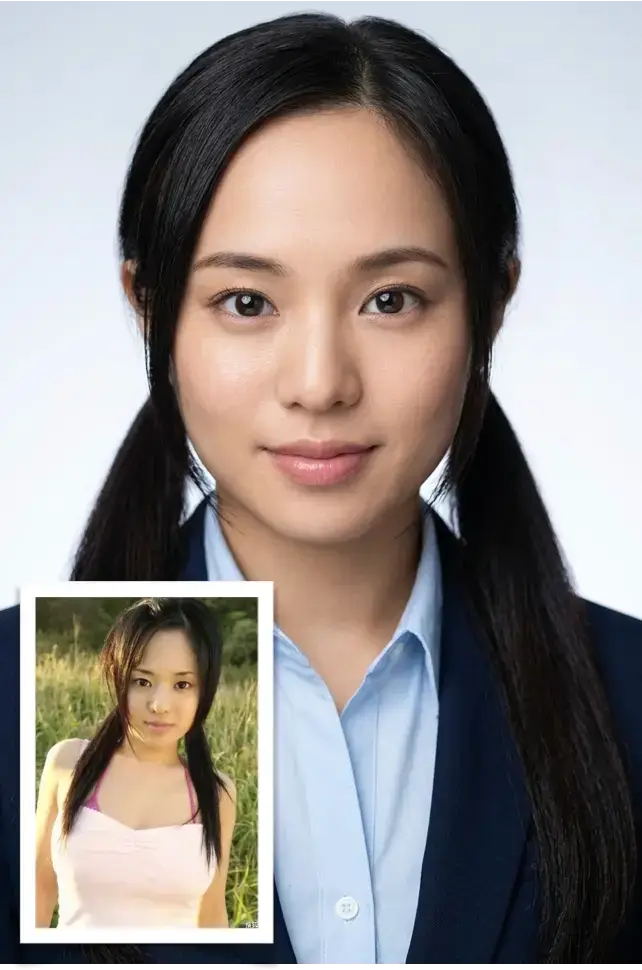
A usable professional headshot needs three things to be right: your face is readable, the light across it is even, and nothing in the frame competes with you. This template works from a photo you already have and rebuilds the parts that normally come from a studio, which is the backdrop, the balance of light on the skin, and the head-and-shoulders crop.
That is enough for a work profile, a résumé header, a company team page, or a speaker card on a conference site, all places where your face shows up a couple of hundred pixels wide. It is not enough for a magazine portrait, and it will not produce a document photo that has to meet a fixed size and background rule.
What the template changes and what it leaves alone
The output is a head-and-shoulders mid-shot, centered, on a soft gray-to-white gradient, with the face in focus and the overall contrast kept low. Clothing usually drifts toward business dress, so a t-shirt or a summer top often comes back as a jacket or a collared shirt. The face, the hair, and the general pose still come from your photo, and that is where you should be looking when you judge the result.
It earns its keep when the alternative is another year of a cropped group photo with someone's elbow still in the frame, or a holiday shot where the sea does most of the talking. Profile pictures, team pages, business cards, and conference bios are all small formats, and small formats forgive a lot: nobody who sees your face at 200 pixels can tell the difference between this and a real sitting.
Two cases are worth skipping. If your head is turned past roughly 30 degrees, or part of the face is hidden, the model has to guess at the missing half and the left and right sides stop matching. And if the photo has to satisfy an official requirement such as a fixed printed size, a specified background color, or a no-retouching rule, a template that decides its own crop and backdrop is the wrong tool. Retake the photo or use a booth instead.
Running one photo through the template
The template makes a single pass from the photo you hand it, so the source sets the ceiling. If the light on your face was green from a shop sign or orange from a sunset, that cast tends to survive in the skin, and no instruction you type will clean it out completely. Choose the source first and worry about the wording second.
- Pick the source photo before you touch anything else. You want the whole face visible, front-on or close to it, both eyes open, and nothing crossing your eyebrows, mouth, or chin. A photo somebody else took from a step or two away beats a mirror selfie, where the phone usually hides half of your face.
- Zoom to 100% on the eyes and check how sharp they are. If the lashes and the edge of the iris have smudged into each other, the headshot will be soft in exactly the same place. A sharp photo in mediocre light beats a beautifully lit photo that is already blurry.
- Crop to head and shoulders yourself before uploading. Leave a little space above the hair, because a crop that clips the top of your head leaves the tool nothing to work with, and most platforms cut the sides again when they fit the picture into a square or a circle.
- Add one short instruction about what must not change. Naming things to keep, such as 'keep the dark shirt' or 'plain light background', works better than a paragraph describing a mood, since every extra adjective is one more thing the tool is free to invent.
- Put the result and the source side by side at 100% and read the face, not the background: hairline, ear shape, jawline, any mole or scar, the frames of your glasses. Two attempts is normal. A shifted jawline means starting over from a different photo rather than reprocessing this one.
- Save the source file untouched and give the result a new name. Two or three runs from different source photos get you further than ten runs from the same one, and when you compare versions a week later you will want to know which file came from where.
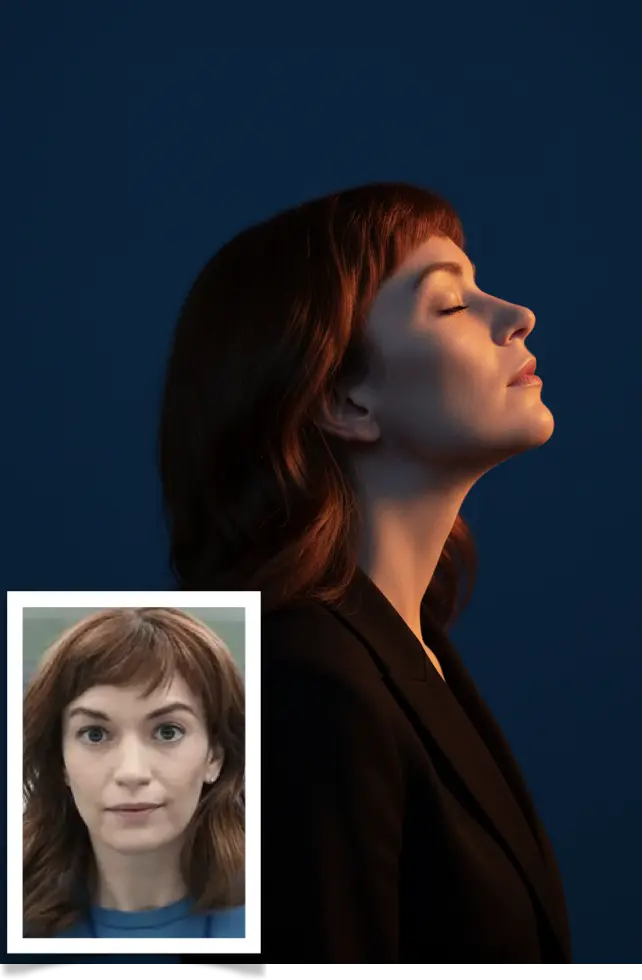
Making the result still look like you
Profile slots are rarely the shape you upload. A work profile displays a square, team pages usually use a circle, and a résumé header is wider than it is tall, so keep the face centered with a little room above the hair and none of those crops will cut into your eyes. Past that, what decides whether the result reads as you is the source photo, not how you word the request.
- Even light, no hard shadow down one side. Flat light from a window or an overcast day is what you want. Half a face in shadow from a single lamp forces the tool to reconstruct the dark side, and the two halves stop matching.
- Front-on with both eyes open, looking at the lens. Past roughly 30 degrees of turn the far eye gets thinner in the frame, and the rebuilt face drifts toward a symmetry that never was yours.
- Nothing over the face. Hats, sunglasses, a scarf up to the chin, a hand holding the phone, a fringe covering one eye: whatever is hidden gets invented, and invented features are what colleagues and relatives notice first.
- A plain background behind you. A wall, a hedge, open sky. Bookshelves, crowds, and backlit windows blur the boundary around your hair, and a fuzzy outline is the one artifact everybody spots immediately.
- Leave the skin texture in place. If the result looks ten years younger, or the teeth have gained a shade of white, the face has already drifted. Ask for the original skin texture and pick a source photo with softer light instead of adding more smoothing.
Where it goes wrong
Glasses and eyes are the first casualties. Thin frames can bend or vanish, reflections flatten into gray patches, and a squinting photo sometimes comes back with the eyes opened farther than yours ever are. Teeth are next: a wide smile can return with a different number of them, or with a brightness that pulls attention away from everything else in the frame.
The more serious failure is drift, where the features get averaged toward a generic studio face and you end up looking at somebody who resembles you. That photo is worse than an imperfect picture of the actual you, particularly on a résumé or a company page where people are trying to match a name to a face. A headshot also cannot be brought up to date later: if the source is ten years old, or shows a beard you have since shaved, no number of extra passes makes it current.
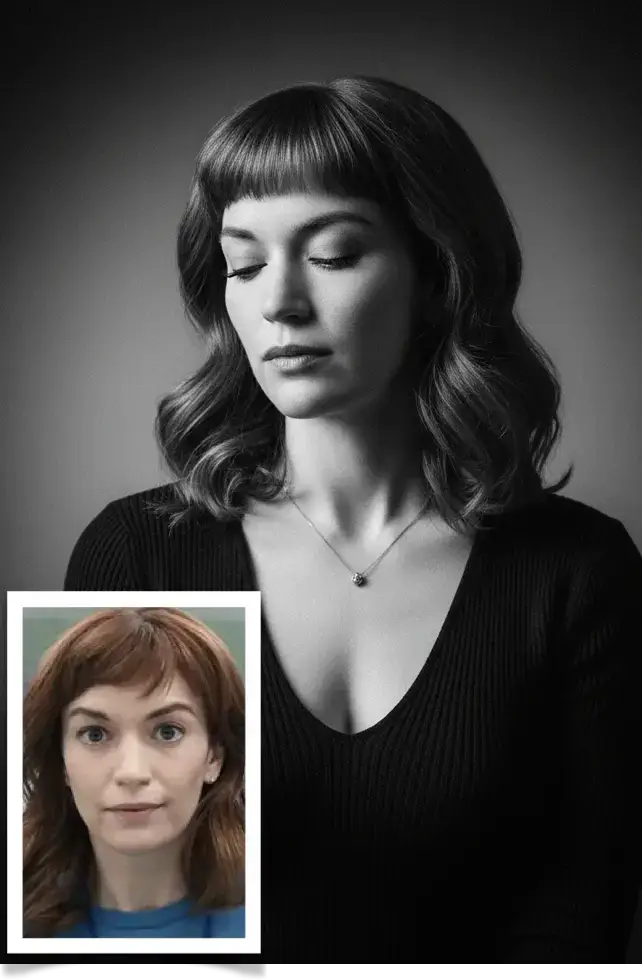
Compare the result and the source on one screen, side by side. Across two devices, or a week apart, small changes in the shape of a jaw or an ear are very easy to miss.
Keeping a set of portraits consistent
A team page looks coherent when every photo was handled the same way: the same kind of source photo, the same instruction, the same output crop. Ten headshots with ten different backdrops read as ten different companies. If you are collecting pictures from colleagues, send them one example of the source you want, flat daylight against a plain wall and framed to the shoulders, and then process the whole set yourself instead of letting everyone run their own version.
Scanned portraits from a family album go through the same template, with one extra pass in front of it. Dust, creases, and faded color are a repair job; turning a repaired print into a portrait is a second job. Doing them in that order gives you two checkpoints where you can look at the face and decide whether the likeness held, and it is also how portraits from different decades end up looking like they belong on the same page.
FAQ
- Can a phone selfie work as a professional headshot?
- Yes, when the face is sharp, front-on, and evenly lit. A photo someone else takes from a step or two away usually beats a selfie, because the phone is not blocking any part of your face and the perspective is flatter.
- How do I keep the result recognizable?
- Start from a photo where both eyes and the whole jawline are visible, add one short line about what should stay, and compare the result against the source at 100% before you use it anywhere. If the face has shifted, run it again from a different photo rather than continuing to rework that output.
- What background should I ask for?
- The template produces a soft gray-to-white gradient, which is safe almost everywhere. If an employer or a form demands a particular color, check that requirement before you start, because a generated backdrop is not built to match a fixed color value.
- Why do glasses and hair edges come out wrong?
- Frames, lenses, and loose strands of hair are thin, low-contrast shapes, and reflections or a busy background behind them swallow the real outline. Pick a photo without reflective lenses and with a plain wall behind you, and the edge comes back cleaner.