How to Remove an Unwanted Object From a Photo
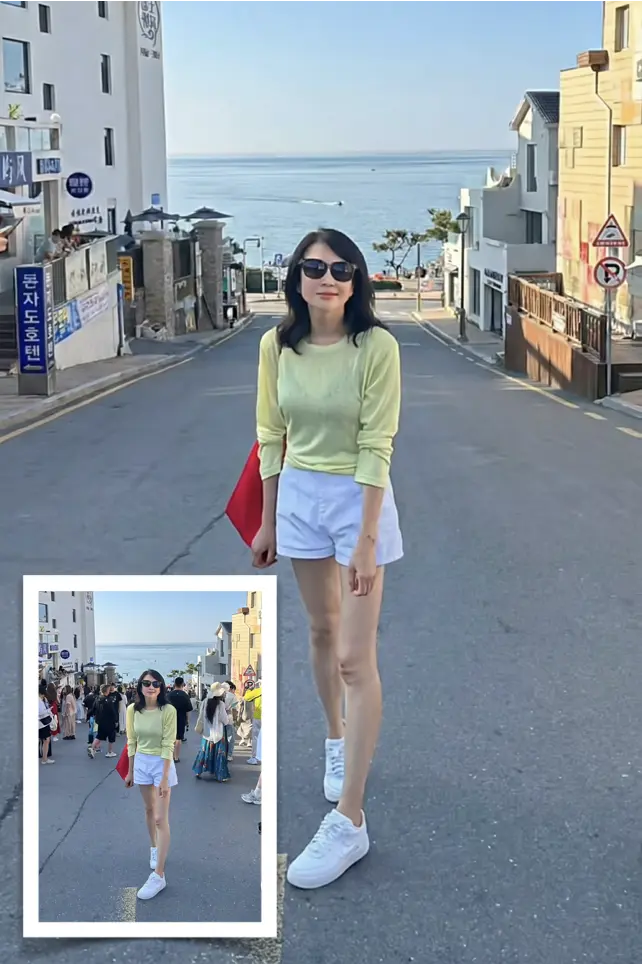
Keep the original file unchanged for comparison. Open the template and upload one clear source photo.
Edit the text prompt to identify what to remove and what must stay. AI can change faces, lettering and background details; hidden detail is not guaranteed to be recovered.
When a removal is worth doing
The test is simple. Can the background behind the object be inferred from the pixels around it? Open sky, grass, water, asphalt, painted walls and gravel have no fixed shape, so whatever gets rebuilt there usually disappears. If the object hides something specific, half a face, lettering on a sign, a row of railings, the tool has to invent it, and invented detail is the first thing a viewer notices.
The practical cases are the ones everyone runs into. A travel photo you want to keep, with a passer-by standing in the middle of it. A room or a second-hand item you are photographing to sell, with laundry, cables and packaging still on the floor. A slide for a report that needs a background without distractions.
Before you start, make sure the photo is yours or that you have permission to edit it, and save a copy of the original file rather than overwriting it. You need that untouched version to compare against, otherwise you cannot tell whether the repair improved the picture or only smeared it.
How to Remove an Unwanted Object From a Photo
Open the template and upload one clear source photo. Edit the text prompt to identify what to remove and what must stay. Click Generate and wait for the result.
- Keep the original file unchanged for comparison.
- Open the template and upload one clear source photo.
- Edit the text prompt to identify what to remove and what must stay.
- Click Generate and wait for the result.
- Compare the whole image and fine details with the original, then download the version you want.
- If the result is wrong, return to the original, revise the prompt and generate again.
Habits that keep the repair invisible
AI can change faces, lettering and background details; hidden detail is not guaranteed to be recovered. Keep the original file unchanged for comparison.
- Edit the text prompt to identify what to remove and what must stay.
- If the result is wrong, return to the original, revise the prompt and generate again.
- AI can change faces, lettering and background details; hidden detail is not guaranteed to be recovered.
- Walk the repeating textures at 100%. Brick, tile, fence wire, fabric and gravel are where duplication shows up, as an element that appears twice on an obvious rhythm or a shadow that suddenly doubles.
- Check the whole frame before you download. Zoom out to the size people will actually see the photo at. A patch that looks fine at 300% can pull the eye at normal size when its brightness or its grain does not match the neighbourhood.
Where it goes wrong, and how to get out
Fine detail that was fully hidden cannot be recovered, only approximated. Leaves and branches, hair, thin metal mesh and printed patterns sitting behind the object come back as a plausible blur, and that blur is obvious at 100%. In low light the repair zone often ends up cleaner than its surroundings, because the surrounding noise is not rebuilt with it. Lettering is a special case: if a word is half covered, the repaired half becomes a meaningless shape, so it is better to remove the whole sign than part of it.
If the result is wrong, return to the original, revise the prompt and generate again. AI can change faces, lettering and background details; hidden detail is not guaranteed to be recovered. Compare the whole image and fine details with the original, then download the version you want.
If the object is covering something a viewer will look for, half a face, a logo or a shop sign, leave it in. A real photo with a stranger in the background usually reads better than a patch that has no explanation.
Clean up first, upscale second
The usual order is removal first, then upscaling. The repair rebuilds texture from pixels that are already in the file, so it should see the sharpest version you have. Run the upscale first and you hand it pixels that an algorithm has already smoothed and, in places, invented; the repair then copies that, and the final image looks softer than it needs to. Removing first also means whatever gets sharpened afterwards is detail you actually kept.
Two situations are worth reversing. If the object is small and sits in a plain area such as sky or a painted wall, cleaning it up is nearly impossible to get wrong at any size, so upscale first and leave the removal as the last step, on the exact pixels you plan to publish. And if you deliver at a fixed large size, enhance a copy just to see whether the defect is even visible at that size; when it disappears at output size, the repair is wasted work.
FAQ
- Can I remove a person standing in front of another?
- AI can change faces, lettering and background details; hidden detail is not guaranteed to be recovered. If the result is wrong, return to the original, revise the prompt and generate again.
- Why does the repaired area look blurry?
- AI can change faces, lettering and background details; hidden detail is not guaranteed to be recovered. Compare the whole image and fine details with the original, then download the version you want.
- Can it remove text, a logo or a watermark?
- On your own photo that is the same job as removing any other object. Do not use it to strip a watermark or a credit line from someone else's image. Be aware that a mark sitting on top of detailed texture often leaves a visible smear, so it can look worse than the mark did.
- What should I check before downloading the result?
- Compare the whole image and fine details with the original, then download the version you want. If the result is wrong, return to the original, revise the prompt and generate again.