How to Restore Old Photos: Scanning, Color, Detail
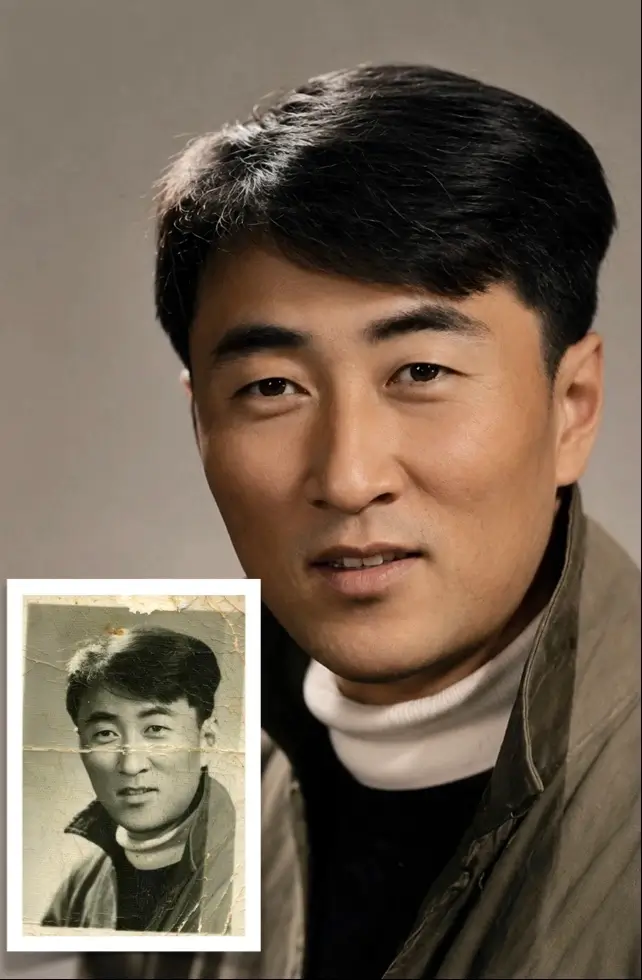
Most family photo boxes hold two kinds of damage. The chemical kind: a print that has yellowed, lost contrast, and turned a white shirt into beige. The physical kind: a fold across one cheek, tape that left a brown stain in the corner, a watermark creeping up from the bottom edge. A restore pass handles the first kind well and the second kind maybe half the time.
One thing worth knowing before you start: this rebuilds the whole picture instead of gluing the crack back together. Whatever survived in the scan can be recovered. Whatever was never recorded gets guessed from the pixels around it, and whether that guess still looks like the person decides whether the file ends up framed on a wall or filed away.
When restoring an old photo is worth a pass
Upload one photo and you get back a clearer, colorized version of it, with the framing, pose and proportions of the original kept in place. It suits portraits where the subject fills at least a third of the frame, and prints that are complete but tired.
The promising signs are easy to check yourself. Open your scan at 100% and look for eyelid lines, the corner of a mouth, the weave of a jacket. When those structures are still in the file there is something for the tool to work from, and the person who comes back is usually still the person.
Faded prints recover well, because the detail sits under the yellow cast and only the contrast has to be rebuilt. Missing detail is a different problem: a blown-out highlight with nothing recorded in it, a torn corner that took half an eye, or a photo that survives only as a compressed copy forwarded through a family group chat. Those come back looking like a redrawing of the subject rather than the subject.
Skip the pass when you plan a large print and the only source is a phone snap of a print taken at an angle. Small errors that hide on a screen turn into visible damage on heavy paper, and a proper flat scan of the same photo is worth more than any amount of retrying afterwards.
From album page to finished file
The twenty minutes you spend on the source file decide most of the outcome. Glare, a tilted camera and sharpening baked in by scanner software all travel with the upload, and none of them can be undone later.
- Take the print out of the album or the frame first. Shooting through glass or a plastic sleeve adds reflections and a haze that the tool reads as part of the photo.
- If you have a scanner, use it: 600 dpi for a print up to postcard size, 1200 dpi for a small print you may want to crop into. Turn on descreening when the picture came off a book or newspaper page.
- With a phone only: lay the print flat, stand slightly to one side so the window light rakes across it, and shoot straight down from about 30 cm. No flash, no digital zoom, and leave a little space around the edges.
- Open the file at 100% and decide which single fault matters most this time. A crease across a mouth and a crease across a background wall are not the same problem.
- Upload the untouched scan to the Old Photo Restore template, one photo per run. Do not pre-sharpen or add noise reduction; those edits get read as real detail and amplified.
- Compare the result with the original at the same zoom level, then download. Keep the original scan in a folder you never overwrite.
Keeping the face recognizable
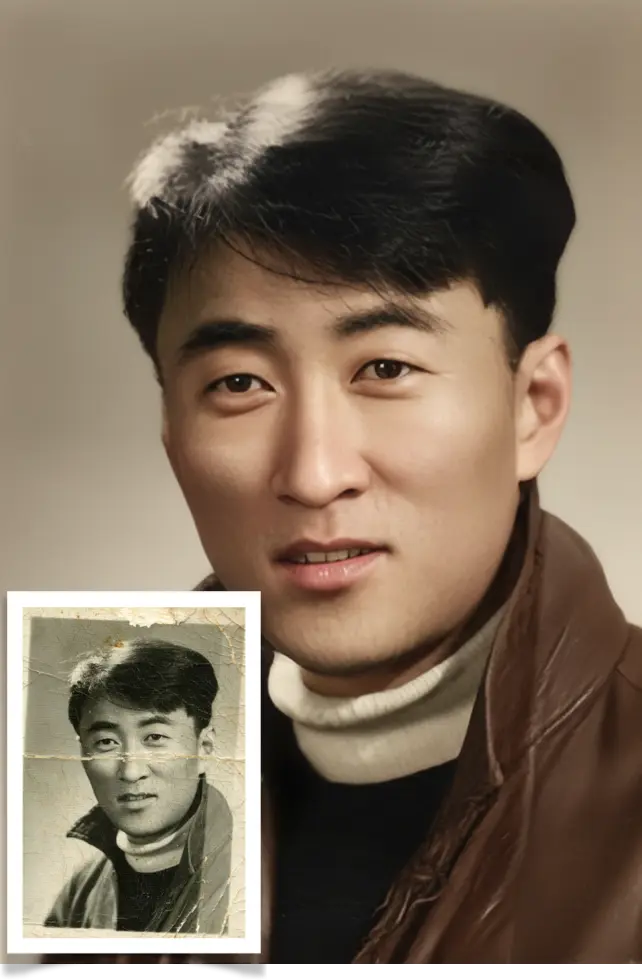
The usual disappointment is not leftover scratches. It is a face that comes back smoother, more symmetrical and younger than the person in the print. Clean skin appears far more often in the material a tool like this learns from than torn paper does, so wherever detail is missing it fills in something average.
- Fix the source before anything else. When the scan carries real eyelashes and lip edges, the coloring follows them; when it carries mush, the tool invents.
- Judge the result at 100%, looking at the eyes, the mouth corners and the hairline. Glassy eyes, or an iris that has shifted color, mean this is not the version to print.
- Run the same file twice and compare instead of chasing settings. Reconstruction is not perfectly repeatable, and the second attempt often handles a crease or a heavy grain pattern differently.
- Split crowded groups. On a table shot with eight people, the faces at the back are a few dozen pixels wide and come back as strangers. Restore two- and three-person crops, then choose between the crops and the full frame at the end.
- Leave the proportions alone. The template holds the original ratio, so any square or 4x6 crop is your decision and belongs after the download, not before the upload.
Where restoration stops working
Some damage can only be invented, not reconstructed. Blown highlights, blocked shadow and missing corners hold no information to work from. Fine pattern is the other weak spot: lace, beading and dense foliage tend to return as a regular repeating texture that reads fine at arm's length and obviously artificial at 100%.
A second run usually produces different detail rather than more detail, so compare two versions instead of running the same file five times. Color is a reconstruction as well: a print that faded to near-monochrome comes back with confident colors that may not match anyone's memory, a grey jacket turning navy, a brown coat turning wine red. Where likeness matters more to you than color, keep the restored black-and-white version alongside the colorized one.
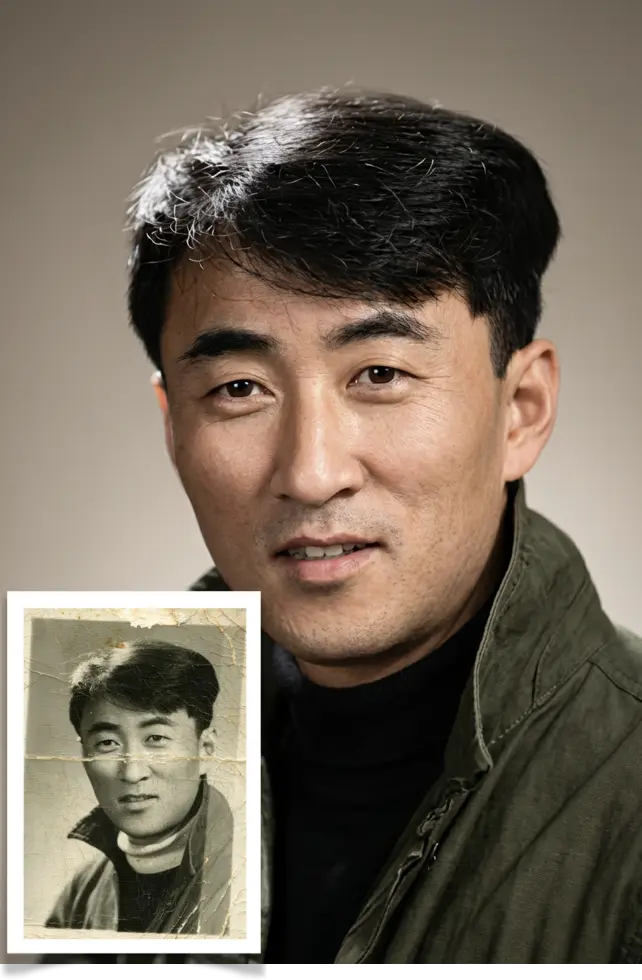
Keep the scan, and judge the result at the size you actually intend to print: repeat texture and flat skin hide perfectly on a laptop and show up immediately on A3 paper.
What to do with the restored file
Most people restore a photo in order to hand it back: a framed print for an anniversary, an image for a memorial card, or a family group photo that three cousins have argued about for years because only one of them kept the original.
When the restored photo is a single portrait, the natural next step is a headshot treatment: crop to a square, put the eyes on the upper third, and run every portrait from the same era through the same template so the set hangs together. A row of family photos looks wrong when each frame carries its own color temperature and background tone, and matching them afterwards is far more work than running them the same way from the start.
FAQ
- Can a badly scratched photo be fully repaired?
- Hairline scratches over flat areas such as walls and clothing usually disappear. Scratches that cross an eye, a mouth or an existing line in the photo come back as a smooth patch, which can be more noticeable than the scratch was. Run it once more and keep whichever version reads better.
- Does restoration change the aspect ratio?
- No. The template keeps the original proportions, so a scan of a 6x4 print stays 6x4. Crop after downloading if you need a different frame size, rather than cropping the scan before you upload it.
- Is a phone snapshot of a photo good enough?
- It works when the print fills the frame, the light is even and there is no glare. Shoot from directly above, no flash, no digital zoom. A precise crop out of a big sharp file always beats shooting the print from a distance to avoid the edges.
- Why is the color different from what I remember?
- Coloring is inference: the tool reads grey values and decides. Dark coats, uniforms and patterned fabric are the hardest cases, and a second run often answers differently. When accuracy matters more than brightness, keep the restored black-and-white version too.